Products
DATA RECOVERY
DATA RECOVERY
BEST DATA RECOVREY/SERVICE IN BOTSWANA
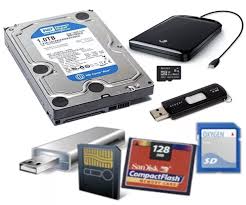
We recover data from all Storage Media incl. USB, Memory Cards, to hard drives. We are specialists to recover data from complex RAID servers, NAS & SAN storage devices
Recover Drive
The Recover Drive search is best used when:
- a drive has been formatted;
- a drive has been formatted and windows has been reinstalled;
- a Windows recovery or system restore has resulted in a fresh installation of Windows and the previous user created files are missing;
- a drive letter has gone missing;
- the drive is recognized by your PC as RAW and no files can be read;
- or some other problem has effected the entire contents of the drive.
- It can be used for both NTFS and FAT data recovery
PRINTER REPAIR
BEST PRINTER REPAIR/SERVICE IN BOTSWANA
BEST PRINTER REPAIR NEAR ME GABORONE
MICROWAVE REPAIR
MICROWAVE REPAIR
BEST MICROWAVE REPAIR/SERVICE IN BOTSWANA
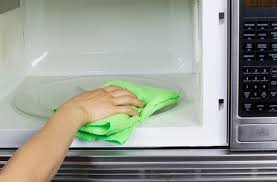
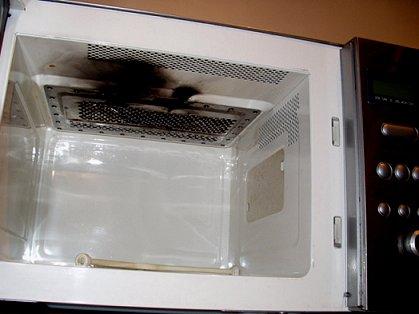

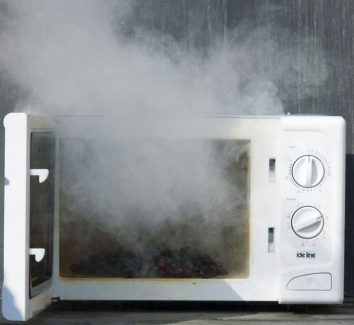
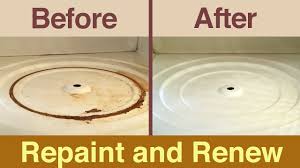
Microwave is a popularly used kitchen appliance these days. Like any other home appliance a microwave fails and breaks in its lifetime. Here are the common faults with your microwave :
Microwave does not heat
Microwave not heating is a common problem. Most popular reason behind this issue is magnetron failure. A magnetron uses high voltage to produce microwave frequency to cook food. If the microwave is turned on when it is empty, this cause the magnetron to burn out. A burned magnetron has to be replaced as it cannot be repaired. Other probable causes behind this problem are faulty diodes, capacitor burn and transformer failure.
Microwave runs and then stops
Possible causes behind this issue are faulty door switch, failed transformer, defective touch pad and faulty fan motor.
Microwave buttons do not work
If the microwave buttons do not work it indicates that the touch-pad or the control panel are defective or have been damaged. Another possible reason can be defective main control board.
Microwave plate does not spin
In a microwave there is a rotating motor below the plate which is responsible for the rotation of spinning plate. So the most probable cause behind this issue is a worn out or burned motor. Motor can be easily replaced. However, if the motor is not defective this indicates a fault in the main control board. If the control board is fine then check touch pad or control panel for the problem.
Microwave light-bulb does not turn on during operation
There is a small bulb inside your microwave located behind the grill, which lights when the microwave runs. If the bulb does not work then it may have fused. Another possible reasons are faulty bulb socket and bad wiring. If the bulb, socket and wiring are fine then check the main control board. The control board may have gone bad and fails to send voltage to bulb socket.
Sparking inside microwave
Sparking inside microwave is common and does not indicate that your microwave has gone bad. It requires you to immediately switch off your microwave and take to service center for repair. Possible reasons behind this problem are damaged wave guide cover, diode burn, damaged rack support or worn out paint from the inside walls.
If you’re considering buying a new microwave, we would recommend you to consider these:
BEST MICROWAVE REPAIR NEAR ME GABORONE
LAPTOP COMPUTER REPAIR
LAPTOP REPAIR
BEST LAPTOP REPAIR/SERVICE IN BOTSWANA
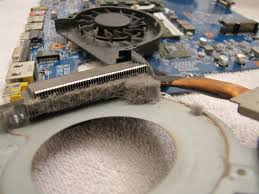

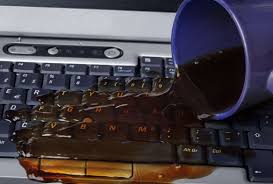
1. Overheating
Symptom: Computer crashes, freezes
2. Slow Hard Drive
Symptom: Excessive program load times, slow file transfers
3. Battery Won't Hold a Charge
Symptom: Your notebook runs only a few minutes when unplugged
4. Need More Memory
Symptom: Sluggish performance when using multiple applications, hangups, excessive bootup time
5. Hard Drive Failure
Symptom: Loud clicking sounds whenever the computer accesses data from the hard drive
6. Bad Keyboard
Symptom: Missing or Loose Keys
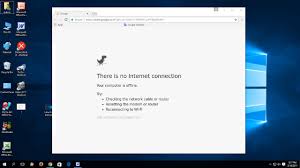
7. Can't Connect to Wireless Network
Symptom: No Internet connection, frequent time-outs while Web browsing
8. Stuck Pixels
Symptom: Green or red dots on your notebook's screen
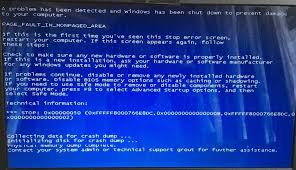
9. System Crash
Symptom: Notebook won't boot up
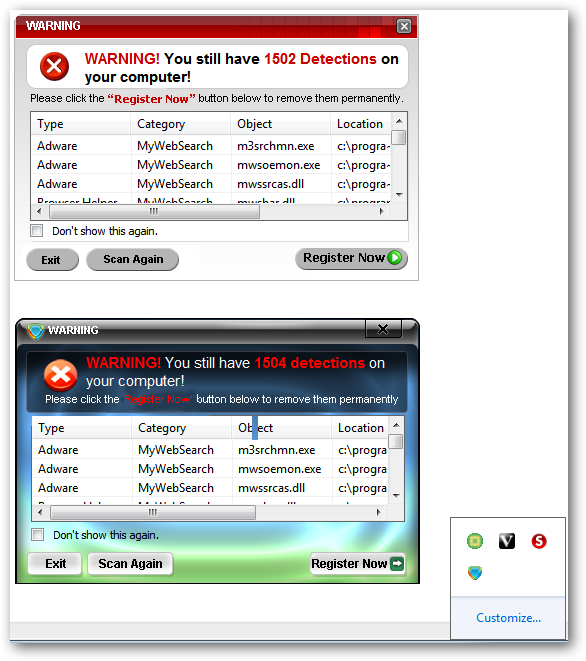
10. Virus or Spyware Infestation
Symptom: Excessive pop ups, slow downloads
11. Outdated Video Drivers
Symptom: Garbled or distorted video
Other common problems
- Problem: Loud fan or heating up followed by shut down. Laptops get moved around a lot. This can lead to limiting air intake to the fan. It also gives them plenty of opportunities to drag dust and foreign particles into their cooling system via their fan portal.
- Problem: Laptop running slowly. This happens quite often and could be related to hard drive space, malware or the first signs of equipment failure.
- Problem: Battery doesn't last. One of the best features of a laptop is that it's wireless. But, we live in constant fear of draining our battery and running out of juice, so we are constantly hard on our battery.
- Problem: No internet. Laptops are notorious for losing connection to the internet, which can be a major hassle. Before assuming some sort of equipment failure, try some basic steps.
- Black Screen. You open up your laptop, power it on, hear it running, but the screen is black.
LAPTOP COMPUTER REPAIR NEAR ME GABORONE
CELLPHONE TABLET REPAIR
CELLPHONE TABLET REPAIR
BEST PHONE REPAIR/SERVICE NEAR ME GABORONE BOTSWANA
HOME & CAR RADIO REPAIR
RADIO REPAIR
BEST RADIO REPAIR/SERVICE IN BOTSWANA
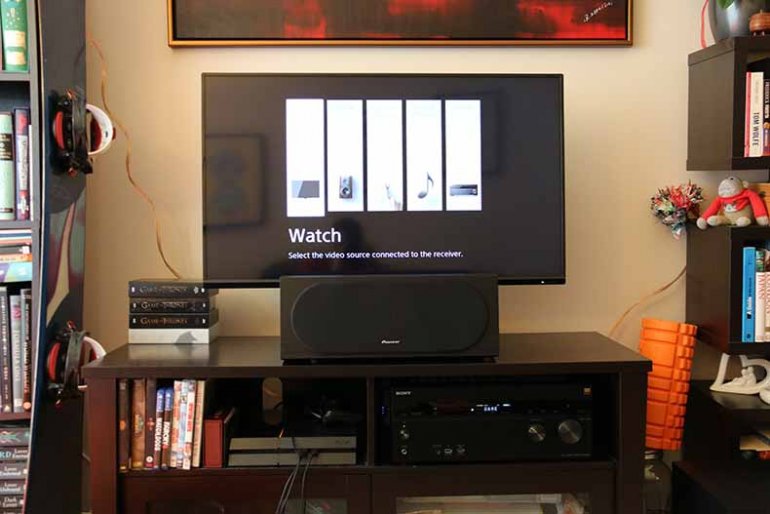 Sony STR-DN1060 Setup
1. I’m Not Getting Any Sound At All
You’ve taken everything out the box, connected it up, spent hours fiddling with connections and stripping speaker wire, and you’re finally ready to crash out on the couch with a bowl of popcorn and watch Netflix in glorious 5.1. Except: you can’t, because there’s no sound coming out of your speakers.
The good news is that it’s extremely unlikely that you’ve suffered a complete system failure. For that to happen, every single speaker in your setup would have to go on the fritz all once, which isn’t going to happen unless there is a catastrophic power surge at the exact moment you put ass to couch leather. The first thing you need to do is check that your receiver is connected up properly. Don’t laugh – it’s a more common error than you think. Admittedly, you would almost certainly have noticed if all five or or seven or nine pairs of your speakers weren’t wired up correctly, but trust us: just check. And when you do, make sure that you unplug the receiver from the power first. You can’t read the rest of this guide if you’re dead from an electric shock.
Assuming everything is correct and connected up right, then the problem is almost certainly a setting in your receiver’s software. Navigate to the on-screen settings menu, and start trying out different speaker settings. In some cases, you may need to manually assign speakers to certain channels, and in others, the source material may not be able to play in the speaker setup you have. Regardless, trying out different settings should very quickly solve this problem. In many ways, a complete lack of sound is the easiest problem to solve – unless you really have been hit by a power surge or shipped a completely dud set of speakers, in which case, we can’t help you. Maybe next time, you should buy a surge protector as well.
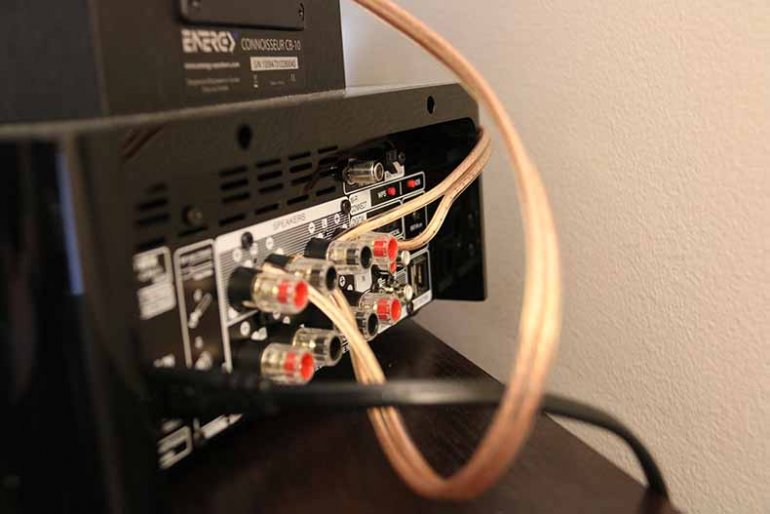 Sony STR-DN1060 Rear Panel
2. My Surround Speakers Aren’t Working
We’re going to propose an almost absurdly obvious solution – one that probably won’t solve the problem, but is worth doing anyway. It is this: turn up the volume. In some cases, the surround material in a particular scene of the movie or series can be very subtle, and your initial impression of there being a lack of surround sound might be because it’s playing very quietly.
Assuming that’s not the case, check the speaker connections to make sure that everything is screwed in correctly.
If that doesn’t solve the problem, it’s time to take a long, hard look in your source material. The question you need to ask yourself is whether your source material is, in fact, capable of 5.1 or 7.1 surround sound. If you’re playing music through your receiver, then it probably won’t be, as most songs are mixed for two channels, not five or seven. Movies and series are far more likely to have a surround mix, but not always, and if that’s the case, you may need to tell your receiver to translate a 2.1 mix into a 5.1 or larger. Receiver settings differ, but you should find the option for this under something labelled DSP settings or similar. Again, play around with different settings, and see if it makes a difference – and you can always test out a source you know is capable of full surround sound in order to check if it’s your receiver or speaker is at fault. Also, bear in mind that you may need to get your Blu-ray player, if you’re using one, to output in multi-channel bitstream. You should be able to find this option in its own settings menu.
3. My Front Speakers Don’t Sound Right
Again, this is something that can almost certainly be fixed by playing around in your receiver settings menu. 90% of the time, it’s to do with the speaker size settings.
Most receivers allow you to set the size of your speakers as either Small or Large. This allows it to integrate them more effectively with the other speakers in your setup. Obviously, Small and Large cover quite a wide range, but it’s fairly easy to pick the right one. If you have a pair of floorstanding speakers in your setup, then pick Large. If your front speakers are the satellite type, then pick Small.
You can change things further by adjusting your subwoofer’s crossover. This is the point in the frequency spectrum where the speakers start to roll off their sound, and the subwoofer picks it up. You may have it set so that your front speakers are taking too much of the bass load, which could distort or otherwise muddy their sound. Start by setting it at 80Hz, and go from there. Our friends at SVS, who produce things like the enormous PB16-Ultra Subwoofer (full review here), have an excellent guide to this.
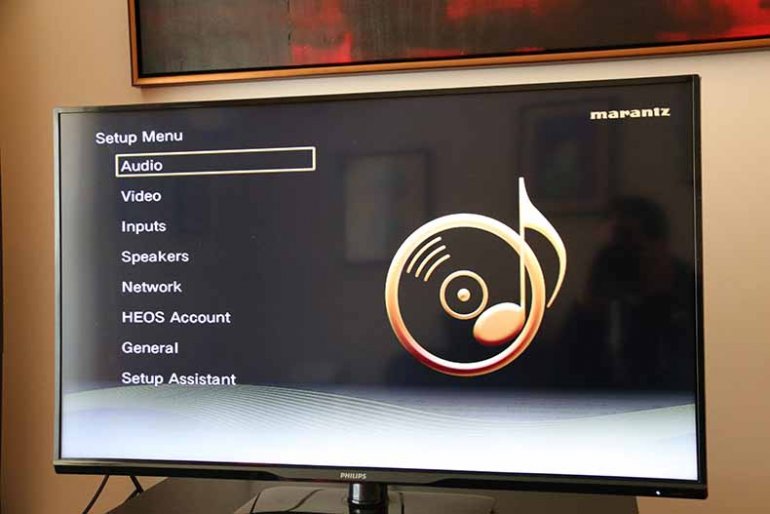 Marantz SR7011 Setup Screen
4. My Height Speakers Don’t Sound Right
Ceiling/height speakers are tricky to get right. The first thing to do, assuming everything is connected up correctly, is to – you guessed it – play around with the settings on your A/V receiver. If you have height speakers, you almost certainly have a receiver capable of 9.2 or 11.2 sound, and it may simply be sufficient to tell it to pick the right codec, which is a term for the software that encodes sound.
If that doesn’t work, you may need to put a little bit of thought into how you’re placing the speakers. Obviously, this takes a little bit more effort (and possibly some exasperating hole-drilling) if you have ceiling speakers, but it is less problematic when you have height speakers. Try moving them around, and testing them with the same source material you used previously. Is there a difference? Is it better or worse? Will angling the speakers in a different way improve the material? It may simply be a case of needing to fix positioning and direction – check the documentation your speakers came with to see if the manufacturer recommends anything specific.
5. There’s Static Coming From My Speakers
In almost all cases, this is a problem with the speaker connection. A wire may have been jarred loose from its socket, and all that is required is that you winkle it back in.
Not solved? The next step is to drill down into the source of the problem. Is the static persistent, or does it only appear at certain points? If so, what are they? A good way of narrowing things down is to try switching out various sources. If you’re using a Blu-ray player, try a different one if you have it, or watch something on a streaming service to see if the static reproduces itself.
During this should help you figure out which part of your system is causing the problem. If you use a power amplifier with your receiver, you may find that the issue is with the connection there - something that is far more common than you’d think. Ultimately, solving a problem with static is almost always an issue with a loose connection, and once you know where it is, it’s relatively easy to fix.
Or, horror of horrors, your speakers might have blown from being mismatched with your amp. You should check this guide so it doesn’t happen again.
 Speaker Phase
6. The Entire System Sounds ‘Off’
This one is a little harder to diagnose.
You’ve positioned the speakers correctly. You’ve set the crossover, picked the correct setting on your receiver, made sure that your room is filled with things that will treat your sound nicely. And yet…something is wrong. The sound feels thin or muffled, with less bass than you’d expect. It’s not something you can quite put your finger on, but you know your system isn’t performing as well as it should be. It might be the entire setup, or it might only be one or two speakers. Whatever it is, it’s annoying. Home theater systems are expensive, and having one not work as advertised is a giant pain in the neck.
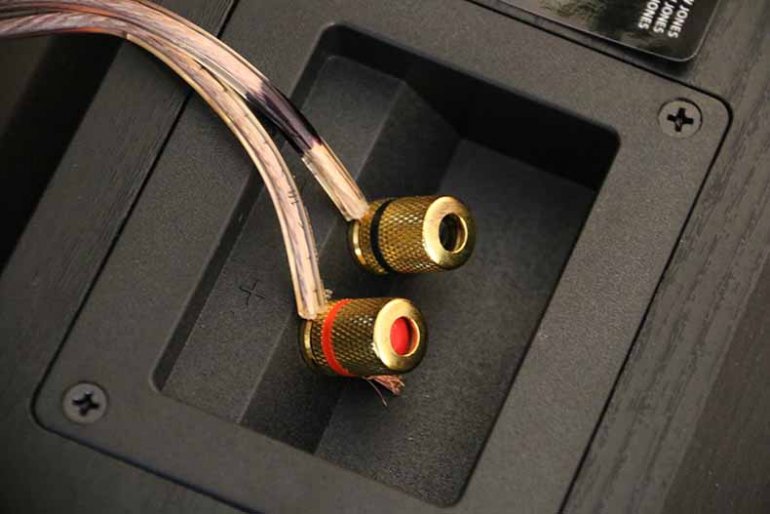
Speakers - all speakers - need to be connected in phase. Each of them will have two connections on the back – a positive one, and a negative one, usually colored white and red. The connections on the back of your receiver will be arranged in the same way. Positive needs to be connected to positive, and negative to negative. If they are reversed, then things are out of phase, and the sound you hear will be diminished.
If your speaker system sounds thin or muffled, the first thing you need to do is check that you’ve connected up your speakers the right way. Some systems will even inform you on screen if something has gone wrong – the Marantz SR7011 receiver (full review here) is an example of a product that is very good at this.
7. There’s An Annoying Hum!
Welcome to the joys of ground loops. Essentially, two pieces of equipment on the same electrical circuit are interfering with each other, producing what is known as a 60Hz ground loop – that annoying hum you can hear through your speakers, that won’t go away no matter how hard you try.
To eliminate it, the first thing you need to do is find out who the culprits are. Instead of just unplugging everything willy-nilly, work methodically. Start with your receiver. A good test is to adjust the volume; if the hum changes, then you’ve found at least one of the culprits. If not, then whatever is causing the sound is causing it after the signal goes through the receiver. What happens if you select another input? Is the hum still there? If it is, remove all cables that connect the receiver to anything else, but leave the speakers connected, along with the receiver’s power cable.
If you can isolate it, all you need to do is remove the offending piece of equipment, which means that piece of equipment may need some repair or further study. The folks at PS Audio have a good guide to this. But let’s assume you can’t isolate it, either by switching inputs or adjusting volume. What then?
Well, it means you almost certainly have a ground loop, and that means you’re going to need one of two pieces of (cheap) equipment to fix it. If the source is your cable TV, you’ll need an isolation transformer, like this one. If the source is something else, try a ground isolator, like this one.
This will fix comes with a big caveat: we are home audio enthusiasts, not electrical engineers, and you do all of this at your own risk. If you think something is seriously wrong, or you’re not confident you can fix it, the best thing to do is either talk to a qualified electrician, or call the customer support line of the people who built your speakers or receiver. They’ll be able to talk you through the process of eliminating the hum, step-by-step.
 Marantz Remote
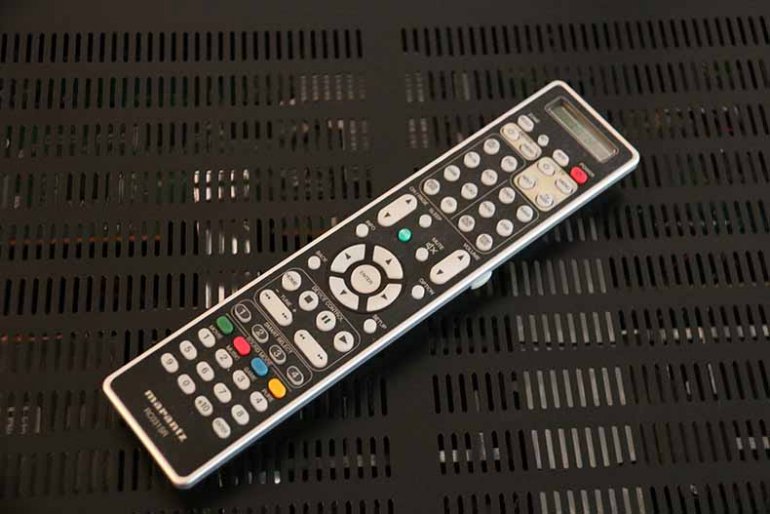
8. My Universal Remote Doesn’t Work
Universal remotes are great. They replace the thousand other little gizmos you need to control your audio life, but every so often, they go screwy.
First things first: let’s eliminate the obvious. Check that the batteries are dead. Check that you’ve got the correct source selected. Check that there is nothing in between the remote and your receiver – this can happen if you put your receiver in a cabinet or cupboard, which is a more common error than you might think. Assuming all those things are hunky-dory, it’s time to get technical.
Go online, and find out if your remote uses Infrared (IR) or Radio Frequency (RF). Do the same for your receiver. A receiver that uses RF won’t be able to pick up a remote that uses IR, and if you’ve ended up with a mismatch, it’s easy to get frustrated – especially if you’ve just bought the remote, and don’t want to go through the hassle of repairs. The good news is that in many cases, you can change this setting on your receiver itself. If you can’t, there are plenty of gizmos which will let you convert from IR to RF, or vice versa.
 Pioneer Subwoofer
9. I’ve Got No Bass
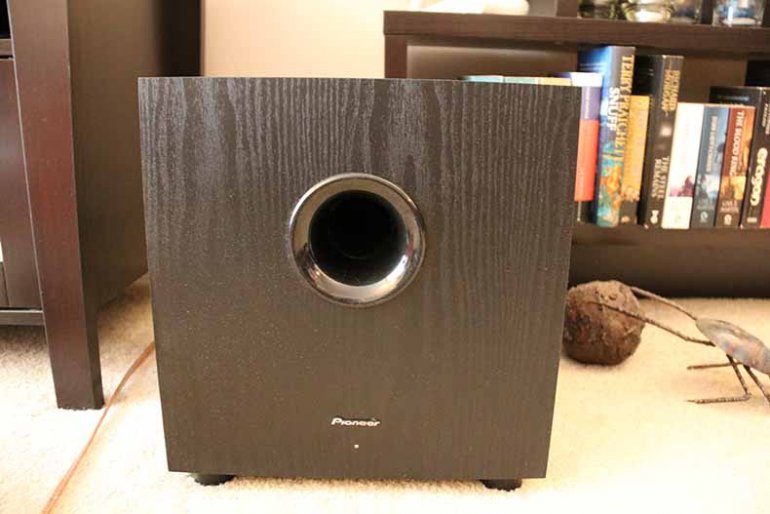
Remember back when we talked about crossover? While trying to solve why your front speakers weren’t working correctly? That’s your very first port of call. Setting the crossover of your subwoofer can often make a dramatic difference to how your bass is perceived. As we said earlier, start from 80Hz, and go from there.
If you still haven’t seen an improvement, then it might be a connection issue – for reference, a single RCA cable from your receiver to your subwoofer should take care of that. But if it really isn’t then it’s a placement problem, then there are a couple of things you need to be aware of.
Traditionally, the most common places to put a subwoofer are in a corner of the room, away from the walls; underneath and in close proximity to the front speakers; or to the side of your listening position. These are the first places you should try if you want to extend your bass. If that doesn’t work, it’s time to try an old trick that sub-lovers have been using for a while now. Take the sub, still connected up, and place it in your listening position. Play something heavy on the bass, then – we mean this – crawl around on the floor, and find out where the bass is most prominent. Put the subwoofer there. It’s an oldie, but a goodie.
10. My Picture Doesn’t Fit My Screen
At TMS, we are more interested in audio than in actual on-screen picture, but this is a common enough problem that we feel confident about tackling it here.
Your picture is too big or too small for a screen because it’s the wrong shape. That means its aspect ratio is out of whack, and that’s the setting you’ll have to adjust. Almost all modern visual media is recorded in two major aspect ratios: 16:9 and 4:3. In most cases, the software in your TV should easily be able to pick the correct one, but every so often, things go awry. And at the same time, if the source of your movie, like a Blu-ray player, thinks the TV is a different size to the one it actually is, it can cause problems. Fortunately, it’s dead simple to correct. Pull up your TV settings, and look for the aspect ratio option. Simply cycle between them until you find one that looks good.
BEST HOME & CAR RADIO REPAIR NEAR ME GABORONE
REFRIGERATOR PCB REPAIR
BEST REFRIGERATOR PCB REPAIR/SERVICE IN BOTSWANA
A Quick Fix Solution = The More Economical Option
Conducting repair work at a PCB (Printed Circuit Board) level allows Customers to use their installed equipment without having to buy a new replacement. PCB repair is economic and hassle-free.
BEST REFRIGERATOR PCB REPAIR NEAR ME GABORONE
XBOX 360 CONSOLE REPAIR
X-BOX 360 CONSOLE REPAIR
BEST XBOX REPAIR/SERVICE NEAR ME GABORONE BOTSWANA
POWER BACKUP INVERTER REPAIR
BEST POWER BACKUP INVERTER REPAIR/SERVICE IN BOTSWANA
Power Backup Inverter Repair
Best inverter design BPS3624 repair.


BEST INVERTER REPAIR NEAR ME GABORONE
PS5 PS4 PSVITA PS3 PS2 REPAIR
PLAYSTATION REPAIR
BEST PLAYSTION REPAIR/SERVICE IN BOTSWANA
The most common PlayStation 4 problems
The PlayStation 4 is a remarkable piece of hardware, but like all game consoles, it’s not immune to the occasional hiccup. Since its original launch in 2013, Sony has worked to resolve many of the console’s intermittent issues through various firmware updates. In 2016, Sony released two new iterations of its premier console — a slimmer model with the same name and the 4K-compatible PlayStation 4 Pro — both of which provide improved performance over their predecessor and address some of the console’s lingering hardware issues.
Still, you may find yourself with a misbehaving unit, and that’s a real bummer if you’re hoping to squeeze some gaming into your busy schedule. Our repair service covers common problems with the PS4 family of systems and offers possible solutions to get you back in the game as soon as possible.
Get in touch with Sony
First, here’s all the information you’ll need to get in contact with Sony if your particular issue is not resolved from our guide.
| Method | Contact |
| Phone | 1-800-345-7669 (Available Monday through Sunday, 6 a.m. to 10 p.m. PT) |
| Forums | Website |
| Live Chat | Website |
| @AskPlayStation | |
You can also search Sony’s error message library and follow the troubleshooting suggestions for the error that you encountered.
Malfunction: Blinking blue indicator light
Three years down the line, the “Blue Line of Death” remains the most-crippling of all problems yet to surface on the PS4. Taking a cue from the Xbox 360’s “Red Ring of Death,” the pulsing blue line indicates a technical problem could mean your console is no longer functional. Unlike the red ring, the “Blue Line of Death” doesn’t automatically mean your PS4 is dead, but it does the same job as the ring; letting you know that there’s a really big problem.
When booting up the PS4, the LED indicator light adorning the side of the console should quickly pulse blue prior to turning white. On consoles suffering from the “Blue Line of Death,” however, the blue light pulses continuously, indicating failed video output before inexplicably powering off. In this case, the console never sends a signal to the TV, essentially bricking the device and preventing normal operation. Sony believed the problem was an isolated incident, but also released a troubleshooting guide highlighting a slew of potential fixes. While the problem was more widespread at launch, it still crops up for a small portion of users and is more likely to be an issue if your console was manufactured between late-2013 and early-2014.
Potential solutions:
As Sony outlined in the aforementioned troubleshooting guide, the blinking blue light could be indicative of a number of hardware or software issues. That said, there are a number of potential solutions you can try. If you do manage to isolate an issue with the PS4 hardware, contact PlayStation customer support, or take your console directly to an official Sony retail store, as they can sometimes provide on-site repairs or replacements. If there isn’t a store available in your area, you’ll likely need to ship your console to Sony. At this point, your console may not be under manufacturer warranty: If that’s the case, keep in mind that you may have to pay a repair fee.
- Update your TV’s firmware — A handful of users have noted that updating television firmware has resolved the lack of audio-video signal. If you have newer television, particularly one with internet connectivity, refer to the television’s instruction manual and update its firmware. Doing so may alter HDMI settings and fix device compatibility.
- Check the HDMI ports — Take a look at both the HDMI port on your TV and your PS4 for any blaring abnormalities or damages, along with your HDMI cable. If possible, try testing alternative HDMI cables.
- Check the power supply — Touch the power button on the front of the PS4 for at least seven seconds, or until the system beeps twice and powers off. Afterward, disconnect the AC power cord from the electrical outlet and check the AC IN connector and power cord for any conspicuous damage or anomalies.
- Check the hard drive — Make sure your PS4 is turned off, then disconnect the AC power cord and any other connected cables before sliding the HDD bay cover outward. Once removed, inspect the hard drive for any potential damage and ensure it is properly seated in the HDD bay.
- Controller reset — Make sure everything is connected properly. Press and hold the PS button on your controller until the system light turns orange. Then, press and hold the PS button again until the light turns white. We have tested this method, and it can get your PS4 to boot properly.
Malfunction: Blinking red indicator light
Reports of the “Red Line of Death” aren’t as widespread as the aforementioned blinking blue light, but it is almost as serious. On consoles suffering from the “Red Line of Death,” the LED indicator light adorning the side of the console will flash red repeatedly, subsequently powering off after the system emits three distinct beeps. The issue is tied to overheating problems as outlined in the PS4 user guide and confirmed by Sony, possibly a result of fan malfunction. Some users have reported the issue within minutes of powering up the console for the first time, however. Thankfully, it’s not the sign of a completely bricked unity.
Potential solutions:
If the problem persists and is not alleviated by either of the potential solutions below, contact PlayStation customer support or take your console directly to an official Sony retail store to arrange a repair/replacement.
- Give it a rest — Touch the power button on the front of your PS4 for at least seven seconds, or until the system beeps and powers off. Then, disconnect the power supply and allow the console to rest for an extended period of time, or until it sufficiently cools down, before powering it up again.
- Give it ample space — Place your PS4 in a well-ventilated area to ensure it has enough breathing room, avoiding carpet and similar services whenever possible. Additionally, some users have reported that placing the console vertically helps decrease overheating (though it shouldn’t considering the position blocks access to either side vent).
Problem: Damaged HDMI port and faulty HDMI cables
It may not be PS4-specific or widespread, but some users have reported issues stemming from a damaged HDMI port shipping on their PS4 units. The problem, which leads to a lack of audio or video output on the TV, is often caused by a connection obtrusion resulting from a bent piece of metal within the console’s built-in HDMI port. Although the reasoning for the bent component is unknown, it effectively renders the port incompatible since the bent piece can no longer properly connect with the HDMI cord. Additionally, there have been reports of faulty HDMI cables that simply don’t work for one reason or another.
While this issue was resolved in subsequent PS4 shipments after the console’s launch, if you purchase a pre-owned unit or you’re experiencing HDMI issues, you’ll still want to look for possible answers below.
Potential solutions:
If neither of the potential solutions below solve the problem, try contacting Sony. Although not confirmed, Sony will likely send you a free replacement cable in a matter of days once the problem has been confirmed.
- Check the HDMI ports — Take a look at both the HDMI port on your TV and your PS4 for any blaring abnormalities or damages, along with your HDMI cable. If possible, try testing alternative HDMI cables.
- Bend back the metal — If you can clearly see a piece of metal bent upward within the console’s HDMI port, bend the damaged piece down using a pin or small tool. Also, make sure the port didn’t knock out any teeth or cause any additional damage to the HDMI cable. If this is the problem, you may still want to contact Sony and ask for a replacement, even if the console begins to work.
- Use a different HDMI cable — If you’re unfortunate enough to receive a faulty HDMI cable from Sony, simple use another on-hand cable or purchase a new one.
Problem: Damaged DualShock 4 analog sticks
We like a lot of things about the DualShock 4 controller, but the soft rubber padding on its analog sticks can tear quite easily when playing a game that requires quick movements, like Bloodborne. But just because the rubber tears doesn’t mean you have to ditch the controller!
s.
Annoyance: Running out of storage space
The newest PlayStation 4 systems, including the “slim” model and the more powerful PlayStation 4 Pro, both have increased internal storage of up to 1TB. This is plenty of space for several AAA games, so you can easily jump between a few of your favorites without having to delete anything. For those with a 500GB internal drive, however, you will find yourself running out of space with regularity, particularly as game updates make your file sizes even larger than they were at launch.
Bug: PlayStation Network connectivity problems
Network connectivity problems are the most persistent complaint with the PS4, and often manifest themselves as either NW-31201-7 and WV-33899-2 errors. The PSN goes down more often than we’d like, but luckily, it’s usually not down for long stretches. Typically, network errors can be attributed to the PSN undergoing service maintenance (error code CE-33991-5), and you will just have to wait it out. Outside of maintenance periods, however, there are a number of methods you can easily perform to get back online.
Malfunction: Disc auto ejects or not at all
User reports regarding malfunctioning optical drives have been trickling out since the PS4 launched. Some consoles are seemingly unable to eject discs, while others automatically eject discs upon insertion. Some reports have even claimed that the console will continuously attempt to eject a disc when there is no disc inserted.
Bug: Disc read and application errors
Disc read issues, which often manifest themselves as error code CE-35486-6, could mean your disc is damaged. While errors for undamaged discs are unfortunate and rare, they are possible. A similar issue with downloaded games can also occur (error CE-34878-0), in which case similar steps can be taken to potentially solve the problem. If the issue occurs with a physical game you’ve purchased recently, the disc may be defective, and you may want to try to exchange or return it.
to reinstall all of your applications — but this could curb various disc and application errors.
BEST PS5 PS4 PSVITA PS3 PS2 REPAIR NEAR ME GABORONE
CAMERA PRO STILL AND VIDEO REPAIR
BEST CAMERA REPAIR/SERVICE IN BOTSWANA
 CAMERA REPAIR
1 – Fixing Camera Shutter Error
Sometimes camera’s shutter gets stuck. In this case if shutter remained open then you will get a overexposed pictures and if shutter does not get opened at all then you will get black photos.
2 – Fixing Camera Lens Error

Lens errors are very common in digital cameras and mostly it is found in camera that has barrel style lenses. The main causes due to which lens error occur is all because of dirt, dust or sands gets deposited inside the lens or if lens get out of their place slightly.
3 – Fixing Camera Software Issues
This is another problem of digital cameras. You will find that hardware is working well but there is an issue in software.
4 – Fixing Camera Battery Error
There are many users out there who reports battery problems. It is true that battery errors can also become trouble for digital camera users.
5 – Fixing a Wet Camera
It is very common problem as camera mishandling can happen with anyone. You may drop your camera by mistake in river, Sea beach side, pool, Water Park or simply in water will damage your camera.
6 – Fixing SD Card Error

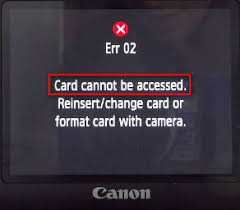
Sometimes you may get frustrated in finding what the problem with your camera is. And later you will come to know that the problem was in SD card and not in the camera. If you are getting “write error” then your photos does not get written to the card. First check your card is not locked and then try to take photos.
If your card is damaged due to dust or dirt then you may get card error. In this case make sure that the metallic part is dust free and if there is any dust then clean it with micro-fiber cloth that comes with camera for cleaning lenses. You may also use can of compressed air to clean the camera SD card slot and card, so that the they can make a good contact.
Different camera uses different format on the card. So formatting the SD card may also fix this problem. But before you format the card make sure that you take a backup of your photos from the card. You can find the “Format” Option in the menu of the camera itself.
When to Purchase New Camera
However, there are other several camera errors and problems which are impossible to do it yourself job. There are many camera repair shop and service center but they are usually very expensive. In many cases purchasing a new camera is better option. Below are few scenarios that will clear your question when to buy a new camera.
- When repairing camera is more expensive than camera itself – Consider your camera is broken or damaged and repairing it, is costing more than your camera itself. You may confirm with your camera repair shop and then you can decide whether to go for new camera or not. You may purchase the older version of the camera it will help you to save money.
- If there is sensor problem – In this case also fixing the sensor problems are tough and very expensive. You may go for replace but again find and estimate the price. If it’s much expensive then you can go for new one.
- When your camera become old – If your camera has problems and you are not able to capture the best quality picture then the best option is to upgrade. In such case you must purchase a new digital camera or old model DSLR camera. You may get surprise by the improvement in quality because digital cameras have been modified with latest technology in the last 5 years.
BEST CAMERA PRO STILL AND VIDEO REPAIR NEAR ME GABORONE
CAMERA PRO STILL AND VIDEO REPAIR
PLASMA LCD LED OLED QLED TV REPAIR
BEST TV REPAIR/SERVICE IN BOTSWANA

SPECIAL ON ALL BACKLIGHT REPAIR WE OFFER  (1) ONE FULL YEAR REPAIR GUARANTEE FROM DAY OF INVOICE . FOR GUARANTEED PROFESSIONAL BACKLIGHT REPAIRES FOR YOUR LED AND LCD IN BOTSWANA TRUST THE BEST VOLTECH SERVICE CENTRE.
Servicing All Makes and Models of Flat Screen TVs.
My TV won't turn on.
Why are there lines on my screen?
I can hear sound but there is no picture.
No matter what problem you are having with your TV, we can help! Whether you have a LCD, LED, or Plasma, we can fix your TV so you don’t have to buy a new one. You probably have a lot of money invested in your home entertainment system and you can't live without it. Nine times out of ten, repairing your television will be cheaper than replacing it. No sound? No picture? No power? No problem!

Our TV repair service, located in Gaborone Botswana, caters to residential and commercial clients. We service all makes and models of flat screen TVs including: Samsung, Hitachi, Panasonic, Toshiba, LG, Sanyo, Vizio, Philips, Sylvania, Emerson, Sony, JVC, Sharp, and more.
With LCD, LED, and Plasma TVs, several components can cause similar symptoms. A thorough diagnostic may be necessary to narrow down the cause. Will your TV not turn on? It could be the power supply or failing backlights. Do you have picture but no sound? It could be the speakers or a faulty board. Our TV repair shop tests each component to determine the faulty part(s) and take the proper action.
BEST PLASMA LCD LED OLED QLED TV REPAIR NEAR ME GABORONE


