
HOME & CAR RADIO REPAIR
Item Code: HOME & CAR RADIO REPAIR
RADIO REPAIR
BEST RADIO REPAIR/SERVICE IN BOTSWANA
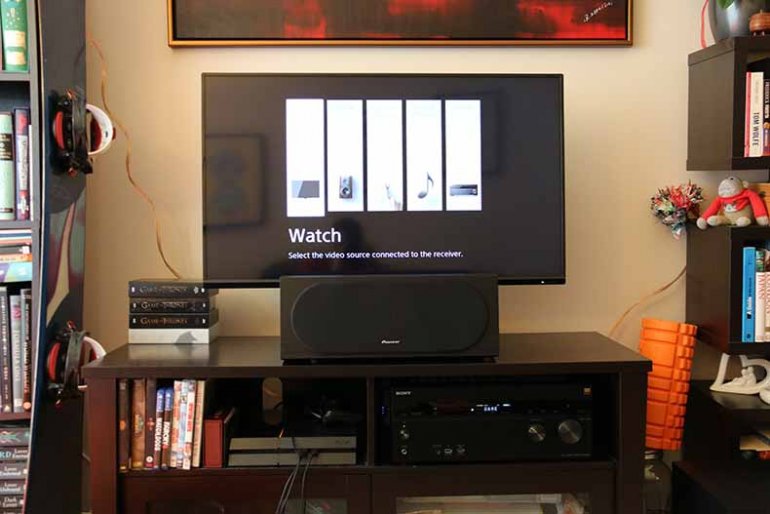 Sony STR-DN1060 Setup
1. I’m Not Getting Any Sound At All
You’ve taken everything out the box, connected it up, spent hours fiddling with connections and stripping speaker wire, and you’re finally ready to crash out on the couch with a bowl of popcorn and watch Netflix in glorious 5.1. Except: you can’t, because there’s no sound coming out of your speakers.
The good news is that it’s extremely unlikely that you’ve suffered a complete system failure. For that to happen, every single speaker in your setup would have to go on the fritz all once, which isn’t going to happen unless there is a catastrophic power surge at the exact moment you put ass to couch leather. The first thing you need to do is check that your receiver is connected up properly. Don’t laugh – it’s a more common error than you think. Admittedly, you would almost certainly have noticed if all five or or seven or nine pairs of your speakers weren’t wired up correctly, but trust us: just check. And when you do, make sure that you unplug the receiver from the power first. You can’t read the rest of this guide if you’re dead from an electric shock.
Assuming everything is correct and connected up right, then the problem is almost certainly a setting in your receiver’s software. Navigate to the on-screen settings menu, and start trying out different speaker settings. In some cases, you may need to manually assign speakers to certain channels, and in others, the source material may not be able to play in the speaker setup you have. Regardless, trying out different settings should very quickly solve this problem. In many ways, a complete lack of sound is the easiest problem to solve – unless you really have been hit by a power surge or shipped a completely dud set of speakers, in which case, we can’t help you. Maybe next time, you should buy a surge protector as well.
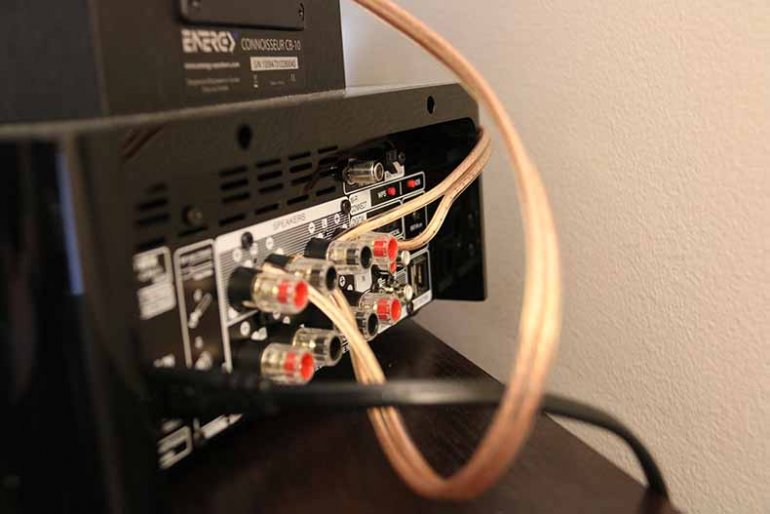 Sony STR-DN1060 Rear Panel
2. My Surround Speakers Aren’t Working
We’re going to propose an almost absurdly obvious solution – one that probably won’t solve the problem, but is worth doing anyway. It is this: turn up the volume. In some cases, the surround material in a particular scene of the movie or series can be very subtle, and your initial impression of there being a lack of surround sound might be because it’s playing very quietly.
Assuming that’s not the case, check the speaker connections to make sure that everything is screwed in correctly.
If that doesn’t solve the problem, it’s time to take a long, hard look in your source material. The question you need to ask yourself is whether your source material is, in fact, capable of 5.1 or 7.1 surround sound. If you’re playing music through your receiver, then it probably won’t be, as most songs are mixed for two channels, not five or seven. Movies and series are far more likely to have a surround mix, but not always, and if that’s the case, you may need to tell your receiver to translate a 2.1 mix into a 5.1 or larger. Receiver settings differ, but you should find the option for this under something labelled DSP settings or similar. Again, play around with different settings, and see if it makes a difference – and you can always test out a source you know is capable of full surround sound in order to check if it’s your receiver or speaker is at fault. Also, bear in mind that you may need to get your Blu-ray player, if you’re using one, to output in multi-channel bitstream. You should be able to find this option in its own settings menu.
3. My Front Speakers Don’t Sound Right
Again, this is something that can almost certainly be fixed by playing around in your receiver settings menu. 90% of the time, it’s to do with the speaker size settings.
Most receivers allow you to set the size of your speakers as either Small or Large. This allows it to integrate them more effectively with the other speakers in your setup. Obviously, Small and Large cover quite a wide range, but it’s fairly easy to pick the right one. If you have a pair of floorstanding speakers in your setup, then pick Large. If your front speakers are the satellite type, then pick Small.
You can change things further by adjusting your subwoofer’s crossover. This is the point in the frequency spectrum where the speakers start to roll off their sound, and the subwoofer picks it up. You may have it set so that your front speakers are taking too much of the bass load, which could distort or otherwise muddy their sound. Start by setting it at 80Hz, and go from there. Our friends at SVS, who produce things like the enormous PB16-Ultra Subwoofer (full review here), have an excellent guide to this.
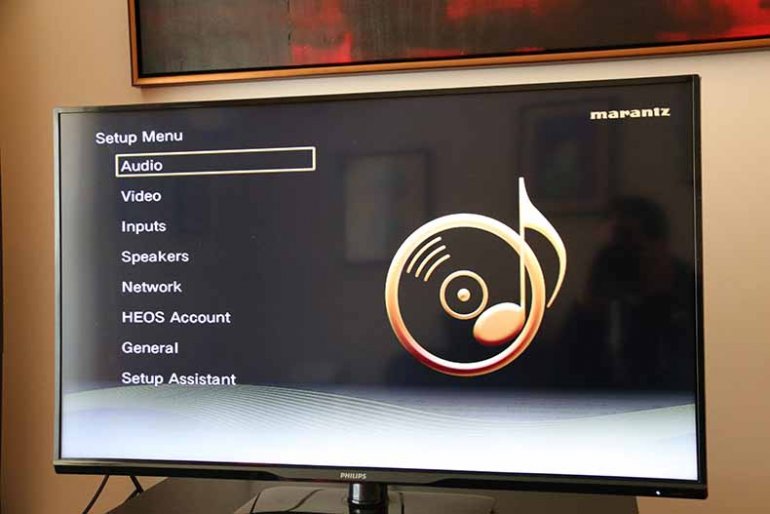 Marantz SR7011 Setup Screen
4. My Height Speakers Don’t Sound Right
Ceiling/height speakers are tricky to get right. The first thing to do, assuming everything is connected up correctly, is to – you guessed it – play around with the settings on your A/V receiver. If you have height speakers, you almost certainly have a receiver capable of 9.2 or 11.2 sound, and it may simply be sufficient to tell it to pick the right codec, which is a term for the software that encodes sound.
If that doesn’t work, you may need to put a little bit of thought into how you’re placing the speakers. Obviously, this takes a little bit more effort (and possibly some exasperating hole-drilling) if you have ceiling speakers, but it is less problematic when you have height speakers. Try moving them around, and testing them with the same source material you used previously. Is there a difference? Is it better or worse? Will angling the speakers in a different way improve the material? It may simply be a case of needing to fix positioning and direction – check the documentation your speakers came with to see if the manufacturer recommends anything specific.
5. There’s Static Coming From My Speakers
In almost all cases, this is a problem with the speaker connection. A wire may have been jarred loose from its socket, and all that is required is that you winkle it back in.
Not solved? The next step is to drill down into the source of the problem. Is the static persistent, or does it only appear at certain points? If so, what are they? A good way of narrowing things down is to try switching out various sources. If you’re using a Blu-ray player, try a different one if you have it, or watch something on a streaming service to see if the static reproduces itself.
During this should help you figure out which part of your system is causing the problem. If you use a power amplifier with your receiver, you may find that the issue is with the connection there - something that is far more common than you’d think. Ultimately, solving a problem with static is almost always an issue with a loose connection, and once you know where it is, it’s relatively easy to fix.
Or, horror of horrors, your speakers might have blown from being mismatched with your amp. You should check this guide so it doesn’t happen again.
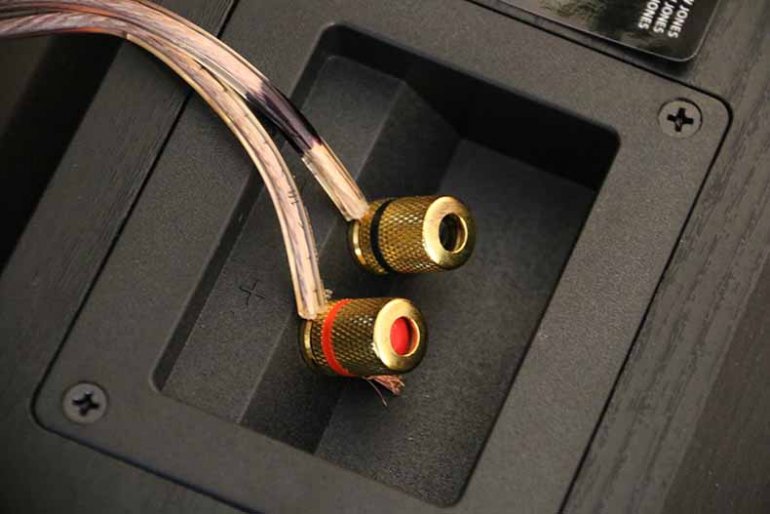 Speaker Phase
6. The Entire System Sounds ‘Off’
This one is a little harder to diagnose.
You’ve positioned the speakers correctly. You’ve set the crossover, picked the correct setting on your receiver, made sure that your room is filled with things that will treat your sound nicely. And yet…something is wrong. The sound feels thin or muffled, with less bass than you’d expect. It’s not something you can quite put your finger on, but you know your system isn’t performing as well as it should be. It might be the entire setup, or it might only be one or two speakers. Whatever it is, it’s annoying. Home theater systems are expensive, and having one not work as advertised is a giant pain in the neck.
Speakers - all speakers - need to be connected in phase. Each of them will have two connections on the back – a positive one, and a negative one, usually colored white and red. The connections on the back of your receiver will be arranged in the same way. Positive needs to be connected to positive, and negative to negative. If they are reversed, then things are out of phase, and the sound you hear will be diminished.
If your speaker system sounds thin or muffled, the first thing you need to do is check that you’ve connected up your speakers the right way. Some systems will even inform you on screen if something has gone wrong – the Marantz SR7011 receiver (full review here) is an example of a product that is very good at this.
7. There’s An Annoying Hum!
Welcome to the joys of ground loops. Essentially, two pieces of equipment on the same electrical circuit are interfering with each other, producing what is known as a 60Hz ground loop – that annoying hum you can hear through your speakers, that won’t go away no matter how hard you try.
To eliminate it, the first thing you need to do is find out who the culprits are. Instead of just unplugging everything willy-nilly, work methodically. Start with your receiver. A good test is to adjust the volume; if the hum changes, then you’ve found at least one of the culprits. If not, then whatever is causing the sound is causing it after the signal goes through the receiver. What happens if you select another input? Is the hum still there? If it is, remove all cables that connect the receiver to anything else, but leave the speakers connected, along with the receiver’s power cable.
If you can isolate it, all you need to do is remove the offending piece of equipment, which means that piece of equipment may need some repair or further study. The folks at PS Audio have a good guide to this. But let’s assume you can’t isolate it, either by switching inputs or adjusting volume. What then?
Well, it means you almost certainly have a ground loop, and that means you’re going to need one of two pieces of (cheap) equipment to fix it. If the source is your cable TV, you’ll need an isolation transformer, like this one. If the source is something else, try a ground isolator, like this one.
This will fix comes with a big caveat: we are home audio enthusiasts, not electrical engineers, and you do all of this at your own risk. If you think something is seriously wrong, or you’re not confident you can fix it, the best thing to do is either talk to a qualified electrician, or call the customer support line of the people who built your speakers or receiver. They’ll be able to talk you through the process of eliminating the hum, step-by-step.
 Marantz Remote
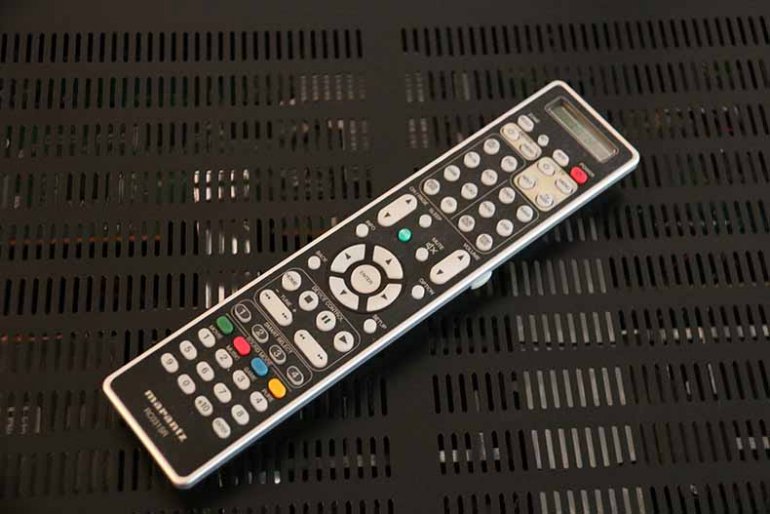
8. My Universal Remote Doesn’t Work
Universal remotes are great. They replace the thousand other little gizmos you need to control your audio life, but every so often, they go screwy.
First things first: let’s eliminate the obvious. Check that the batteries are dead. Check that you’ve got the correct source selected. Check that there is nothing in between the remote and your receiver – this can happen if you put your receiver in a cabinet or cupboard, which is a more common error than you might think. Assuming all those things are hunky-dory, it’s time to get technical.
Go online, and find out if your remote uses Infrared (IR) or Radio Frequency (RF). Do the same for your receiver. A receiver that uses RF won’t be able to pick up a remote that uses IR, and if you’ve ended up with a mismatch, it’s easy to get frustrated – especially if you’ve just bought the remote, and don’t want to go through the hassle of repairs. The good news is that in many cases, you can change this setting on your receiver itself. If you can’t, there are plenty of gizmos which will let you convert from IR to RF, or vice versa.
 Pioneer Subwoofer
9. I’ve Got No Bass
Remember back when we talked about crossover? While trying to solve why your front speakers weren’t working correctly? That’s your very first port of call. Setting the crossover of your subwoofer can often make a dramatic difference to how your bass is perceived. As we said earlier, start from 80Hz, and go from there.
If you still haven’t seen an improvement, then it might be a connection issue – for reference, a single RCA cable from your receiver to your subwoofer should take care of that. But if it really isn’t then it’s a placement problem, then there are a couple of things you need to be aware of.
Traditionally, the most common places to put a subwoofer are in a corner of the room, away from the walls; underneath and in close proximity to the front speakers; or to the side of your listening position. These are the first places you should try if you want to extend your bass. If that doesn’t work, it’s time to try an old trick that sub-lovers have been using for a while now. Take the sub, still connected up, and place it in your listening position. Play something heavy on the bass, then – we mean this – crawl around on the floor, and find out where the bass is most prominent. Put the subwoofer there. It’s an oldie, but a goodie.
10. My Picture Doesn’t Fit My Screen
At TMS, we are more interested in audio than in actual on-screen picture, but this is a common enough problem that we feel confident about tackling it here.
Your picture is too big or too small for a screen because it’s the wrong shape. That means its aspect ratio is out of whack, and that’s the setting you’ll have to adjust. Almost all modern visual media is recorded in two major aspect ratios: 16:9 and 4:3. In most cases, the software in your TV should easily be able to pick the correct one, but every so often, things go awry. And at the same time, if the source of your movie, like a Blu-ray player, thinks the TV is a different size to the one it actually is, it can cause problems. Fortunately, it’s dead simple to correct. Pull up your TV settings, and look for the aspect ratio option. Simply cycle between them until you find one that looks good.
BEST HOME & CAR RADIO REPAIR NEAR ME GABORONE